Showing posts with label tee. Show all posts

Friday, March 23, 2012

DIY Ruffle Shirt


The darling ruffle top tutorial can be found {here}.

All she did was: cute up one shirt in 1 & 1/2 inch stripes & ruffled them. Then she added it to the neckline, then made an extra topstitch a quarter inch from the top.
Easy peasy! It can be worn flipped up or flipped out. So cute huh! And such a fun top for Spring & Summer.


Photobucket

Tuesday, February 14, 2012

Ruffle Necktie Tees Now Available!

Remember {THIS} post?
Well it was quite the popular tutorial. I've loved all the sweet comments & pictures from my lovely readers! I've been asked a lot if I sell them, now I finally do!

I am kind of testing them out to see how they do, so I have 3 available in my etsy shop.
Here they are...


Black Ruffle Necktie Tee- size small {here}

White Ruffle Necktie Tee- size large {here}

Gray Ruffle Necktie Tee- size medium {here}

What do you think?

If you would like me to make you a custom shirt, just shoot me an email :) mckellscloset@gmail.com
I'd be happy to see what I can do.

Photobucket

Monday, September 19, 2011

Long Sleeve Tee Revamp

If you can't tell I've been super into tee makeovers lately.
I like to pretend I can sew ;)

Turn an old long sleeve shirt into a Gathered Sleeve & Bow Tee!

Here's what you need:
Long sleeve shirt
Scissors
Sewing machine, thread & needle.

here's my long sleeve shirt. cute, but super plain!

1- decide where you want to cut your sleeves & cut away. keep your sleeves! you will use them later :) {mine was really easy to cut because it has stripes, so i just cut across the stripe.}

{i didn't bother hemming the sleeves because my tee is knit. but go ahead & hem yours if you'd like!}

2- starting at the shoulder just underneath the hem, do a front & back stitch. using a straight stitch.

3- still using a straight stitch, gather your sleeve up every few stitches. just push up the fabric & sew straight.

4- after you've done both sleeves, this is what your tee will look like.
{you can stop here, but we can make it cuter!}

5- take one of your sleeves

6- cut a piece to make a bow with. {depending on how big you want your bow to be}
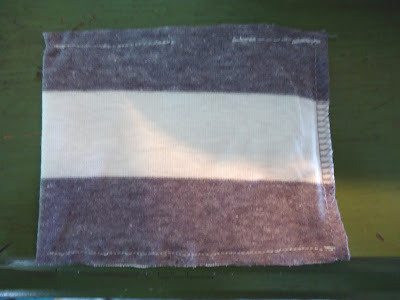
7- turn inside out so right sides are facing each other. you only have to sew 2 sides. on one side leave an opening so you can turn your fabric right side out.

8- turn fabric right side out pushing the corners out with a pencil. hand stitch the opening shut.

9- cut a long stitch of fabric.

10- make a ring out of it.

11- slip your ring over your square fabric to the center.

12- and TADA! you have a bow :)

13- decide where you want your bow to be & hand stitch it on.
and you're DONE! not too hard right?


"Sew" easy & sassy!
I hope you liked the tutorial. Let me know if you have any questions.

Would love to see your Gathered Sleeve & Bow Tees if you decide to make one.
Send me a picture at: mckellscloset@gmail.com

***And the WINNER of the Abby Maddy Designs Giveaway is...................................................
Brenda! Congrats :) Leave a comment with your email & Stefanie will contact you for your prize!!
Thanks everyone for entering!

Have a Happy Day :)

Photobucket

Friday, September 16, 2011

Fall Ribbon Tee Tutorial


Another super duper easy tee makeover.
Turn a plain tee into a fabulous Fall tee!

What you need:
Tee {on hand}
Ribbon {Dollar Tree}
Sewing Machine & pins

Total cost= $1! Mmmmm hmmmm!! My kind of project :)


i found this fab ribbon at Dollar Tree! i knew i could do something with it.

it had wires in it, but all you have to do is pull them out....

and cut them!

pin your ribbon to the center of your tee making sure to tuck ribbon under the top & bottom of your tee.
just do a zig zag stitch on both sides....

and VOILA! a brand new Fall Tee :)
Easy peasy right? This took me a total of 5 minutes.
Very doable.

Enjoy & Happy Thursday all!

Photobucket

Thursday, September 15, 2011

Lace & Bow Tee Tutorial


I've been super bored with my wardrobe lately, so I thought I'd give my boring tees a much needed uplift.
This shirt is great for Fall. Just add a cardi on top & you are set!

Want to make one?
Here's what you'll need:
Tee
Lace
Pins
Sewing Machine
Thread & needle

I had everything on hand, so total cost for me = FREE! :D


1- pin lace around your neckline

2- start sewing where the lace overlaps (this will be covered by a bow later on, not to worry.)

3- i am no seamstress, but i think it's 1/4" inseam. i just sewed on top of the seam that was already on my lace.

4- this is what your neckline will look like when you are done sewing the lace on.
super cute, but we can make it even cuter!

5- how about adding a bow? i think yes!
tie a bow with however long you'd like your tails to be. (i liked my longer)

6- place your bow on top of where your lace overlaps. and hand sew your bow on.

and you're DONE!


What do you think?
I love mine!

If you decide to make a tee, I'd love to see it! Send your Lace & Bow Tees to: mckellscloset@gmail.com

Have a Happy Friday :)

Photobucket

Friday, August 12, 2011

Ruffle Necktie Tee Tutorial

*As seen on CRAFT MAGAZINE*


{Ruffle Necktie Tee Tutorial}

Here's what you'll need...

tee {mine was Forever 21- $1.50, or use one on hand}
tie {thrifted- $2 or use your hubby's old tie!}
button {on hand}
your trusty sewing machine
needle & thread

i hate pinning, so i didn't do it! {i know there are some of you that are shaking your head...go ahead & pin if you'd like!} just wing it! it's funner that way ;)

{1} starting with the left side of the neckline & the small end of the tie. lay tie on top of neckline & start sewing straight.

{2} you will continue sewing a straight line on the left side of the neckline & on the back of the neckline.

{3} STOP when you get to the seam on the top right shoulder.

{4} to make ruffles: fold tie upward & sew on top. continue folding & sewing so it looks like this...

see! ruffles already :)

pretty sure my sewing machine was hating me by the time this was over! it takes a lot of work for my poor $60 sewing machine to make it over all those thick ruffles :)
maybe you could try a jean needle.  it's made for heavy duty sewing, that might make your sewing machine happier.

{5} when you get close to the end, just lay the end of the tie flat. continue sewing until you meet up with the beginning stitch on the left side. {you will want to turn your sewing needle to meet up so it will create a "V"}

the bottom part of your tie will not be attached to the shirt, so it will want to flap like this.

{6} grab that cute button & hand sew it to your shirt.

And you're DONE!!
So easy & stylish!
*I hope these directions made sense. You never know if what makes sense to you in your brain makes sense to others. If you have any questions let me know!

---> I have had a lot of questions on laundering & honestly I haven't washed mine yet (someone ended up wanting to buy both!) This is what a sweet reader said....
"I used to work dry cleaning, and if it's polyester, you'll be fine in general, BUT if it's silk, you might consider washing on delicate with Dawn soap, which is really mild and works well with a lot of hand washables. (except wool... but how many ties are wool?) Cotton is fine, of course. The main reason they want you to dry clean ties is because they can lose their shape when washed, and make the pointed ends all wonky. But, since you're tacking down one end and stitching down the other.... I don't think it'll lose its shape so much."

Thanks Carolina! I hope that helps with your washing questions.


I loved doing this, I had to make another....


I'd love to see your tees if you decide to make one!
Email me a pic of your tees at: mckellscloset@gmail.com


Photobucket